You’ve got the binders; you’ve got the contents. But what about binder organization? We’ve simplified sorting your stuff by offering DIY binder dividers. Learn how to make your information easy to find and always at your fingertips!

What are Binder Dividers?
Binder dividers are tabbed, labeled pages within a binder. They separate sections and make it easier and faster to find exactly what you’re looking for. If a binder has tabbed dividers, readers can quickly and easily review the divider without having to open or rifle through the binder to get a quick sense of its contents.
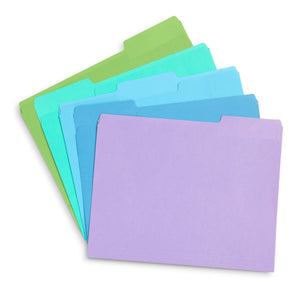
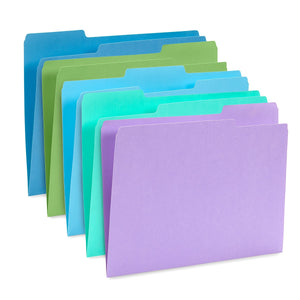
Binder dividers come in many different forms. They can be pages with color-coded plastic sleeves, heavy-duty paper with tabbed dividers, folders designed to double as storage and organization, or simple tabbed dividers which resemble the backside of a standard hanging file folder. All these different styles of binder divider share one common purpose: to turn your collection of papers, printouts, and notes into an easy-to-follow narrative that’s useful and easy to navigate.
How Dividers Can Improve Your Binder
Binders come in a variety of sizes and styles and serve a wide range of purposes. The keys to any good binder are neatness, ease of access, and organization. Binder dividers help binders achieve all three of those goals affordably and effectively.
If you’re using a standard round-ring or D-ring binder, dividers help make a high volume of papers readable and digestible at a glance. They’re great for students and teachers to divide by subject without sacrificing organization or ease of use.
In schools, students are often required to have a large binder with one section for every class. This provides them with a single resource they can take from place to place to help them stay prepared and focused. This strategy can be extended well beyond the classroom, as the tabbed and divided approached helps professionals manage different projects, teams, or campaigns with a single binder.
If you’re using a post- or punchless binder, dividers are even more essential to navigating and understanding the contents. Since pages can’t be flipped through as easily in punchless binders, divider pages are essential to providing readers with clear sections and helping them understand where they need to go to find the information they’re looking for. Without tabbed dividers, punchless binders can easily turn into a mountain of disorganization.
In a school, office, or home setting, divided binders provide maximum storage and ease of access while minimizing use of space and all but eliminating the problem of lost paperwork or documentation.
Where Can You Get Binder Dividers?
Any brick-and-mortar or online office supply store will carry an assortment of tabbed binder dividers. When you’re shopping for dividers, it’s important to visualize how you want your finished binder to look and how many different dividers or organizers you’ll need. These choices can help determine the best binder dividers for your needs. However, if you have a printer and a few basic supplies, you can also create your own custom dividers.
Why Go DIY with Your Binder Dividers?
DIY binder dividers will help you save time and money without sacrificing any of the usefulness of those fancy dividers they’ll try to sell you at the print shop. All you need to get started is a printable dividers template.
If you’re looking for a binder or folder divider template that can transform your binder from “No” to “Pro,” we’re happy to tell you you’ve come to the right place!
Four ways to create professional binder dividers:
- Use our printable tabbed divider template to print labels directly onto ready-made tabbed dividers.
- Purchase ready-made, self-adhesive index tabs, which are often customizable, repositionable, or even decorative to best suit your needs.
- Follow our DIY binder divider instructions below to create your own tabbed dividers from scratch.
- No time at all? Use our “quick & dirty” tutorial below to create simple DIY binder tabs in just a few minutes.
Printable Tabbed Divider Template
Blue Summit Supplies offers a free index divider template to help you print directly onto plain white dividers for the home or office. This downloadable resource provides both PDF and Word templates that you can use to create labels for the various sections of your binder, using either our 1/5 cut tabbed index dividers or 1/8 cut tabbed index dividers.
Using the index divider template, you can create clean, professional-looking binder dividers without the need for a label maker or messy, time-consuming stickers. Adobe Acrobat or Word users can type their desired labels into their word processor, print them, and slip them into their binder in a matter of minutes. This approach is perfect for those short on time who are just starting a binder or reorganizing an existing one, as you can easily go back and change your section headings, add new dividers, or rethink your entire approach without an expensive or time-consuming trip to the print shop or office supply store.
Using Self-Adhesive Index Tabs
If dealing with DIY binder tab templates makes your head hurt, purchasing ready-made binder divider tabs might be your best bet. Self-stick index tabs are manufactured by several well-known companies are one of the quickest ways to create DIY binder dividers. Here are some of the best options out there for self-adhesive tabs:
- Avery's Printable Plastic Tabs– Avery is a household name when it comes to labels, so it’s no surprise that they offer several great options for self-stick tabs. We particularly love this set of printable, repositionable tabs that can also be written on, making them a flexible option for those of us who never get it right the first time.
- Post-It’s Filing Tabs– Post-It is more than just sticky notes. We really like the simplicity of these repositionable, writable tabs, which come in a variety of colorways and formats.
- Redi-Tag’s Printable Index Tabs– If you’re looking for something more durable, Redi-Tag manufactures two different pack sizes of these laser printable index tags featuring a permanent adhesive and 5 different colors per sheet.

DIY Binder Divider Ideas
If you’re looking to create some binder dividers at home and don’t have access to pre-cut tabbed index divider pages or a printer that can handle 9” x 11” paper, here are a couple of DIY ideas you can use to pull something off that’s clear, useful, and inexpensive. With the right binder and smart use of dividers, any collection of notes and papers can transform into an authoritative, easy-to-relate-to presentation of information. At Blue Summit Supplies, we’re dedicated to providing the supplies, tools, and templates that you need to succeed.
What colors work best for DIY binder tabs?
While any color tabs will technically work well for DIY binder dividers, here are some options to keep in mind:
- All one color
- Rainbow colors
- Analogous colors (a small group of that sit next to each other on the color wheel, such as red, orange, and yellow or green, blue, and purple)
- Tints/shades or coordinating colors (such as light pink, dark pink, light purple, and dark purple)
- Coordinated colors (check out A.com for inspiration)

Take into consideration that it can be difficult to read black ink when written or printed onto colored paper which is darker or heavily saturated. It’s a good idea to choose lighter colors for your tabs when printing. If you’re handwriting your tabs, one option is to invest in a white gel pen that can be read easily when written on darker colored paper.
Printable DIY Binder Divider Tabs
It’s easy to create your own tabbed binder dividers using just paper and tape. We created a free editable tab template that you can use to create your own using Adobe Acrobat or Word.
What you need:
- One of our divider templates (download via the form below)
- White paper or cardstock (if using a colored tab template) or colored paper (if using the blank template)
- Cardstock, one piece for each tabbed divider
- Clear packing tape
- Double-sided adhesive roller
- Scissors
 |
Click here to download our free binder divider templates! |
How to make DIY binder dividers:

Step 1: To reinforce the edge of your DIY binder dividers, apply a long strip of packing tape over the left edge of each piece of cardstock, folding it over so that it covers the entire edge. Then, punch the divider with a 3-hole punch for use in a binder.

Step 2: Use one of our editable divider templates to type your label names onto each divider tab. If you prefer to hand-write the labels on your tabs, you can skip this step. Note: The provided divider tab templates feature two text boxes on each tab. Type the same label name into each box, so that the label can be viewed from both the front and back side of the tab.

Step 3: Print out the binder tabs. We recommend using plain white paper or cardstock for the blue or rainbow colored tabs, or solid colored paper for the blank tabs. Neatly apply packing tape to the surface of each printed tab.

Step 4: Cut out each main rectangular tab shape around all four edges. Note: You can save cutting out the decorative, rounded insets on each side for a later step.

Step 5: Fold each tab in half lengthwise, wrong sides together. Firmly crease each fold.

Step 6: With each tab folded, carefully cut away the curved inset on each side to create a traditional tab shape.

Step 7: Open each tab up so that the wrong side is facing up. Apply a strip of double-sided adhesive to the long, straight left and right edges.

Step 8: Determine the placement of your tabs along the right side edges of your binder dividers, taking into account that typically tabs will be placed at varying vertical distances along the divider edges. Adhere each tab to the right edge of a piece of the reinforced 3-hole punched cardstock you created in step 1.

Step 9: Insert your finished DIY binder dividers into a binder. Your tabbed dividers are ready to use!
Try a Tab Punch!
If DIY is your thing, give a tab punch a try. These tools make it easy to punch tab shapes out of paper with no careful cutting or trimming required, and they make it easy to personalize your binder tabs with decorative craft paper. Check out these unique options:
- Tab Punch by We R Memory Keepers– As the highest rated tab punch on the market, this punch is a must-try, alongside their coordinating application stickers.
- Teresa Collins Tab Squeeze Punch by Fiskars– Fiskars is known for offering high quality craft tools. While this particular punch has been discontinued by the manufacturer, a quick Google search pulls up several sellers of the tool on sites such as eBay and Etsy.
- Page Tabs Dies by Sizzix– If you have access to a Sizzix die cutting machine, these Thinlits dies are a fun option for punching a variety of tab shapes out of the paper or cardstock of your choice.
Quick & Dirty: The Easiest DIY Binder Tabs Ever
No time or desire to deal with templates or special materials? Here’s a super-fast and easy way to create a simple tabbed divider.

Step 1: Cut a rectangle from a sheet of colored paper that measures approximately 1.5” wide x 2” tall.

Step 2: Fold the rectangle in half lengthwise and label as desired with a pen or marker.

Step 3: Tape the tab to the edge of a piece of 3-hole-punched paper or cardstock.
 For more informative articles about office supplies, subscribe to our email newsletter!
Never fear, you won't begin receiving daily sales emails that belong in a spam folder. Instead, we promise a fun weekly roundup of our latest blog posts and great finds from across the web. And if you lose interest, it's always easy to unsubscribe with a single click.
What other details do you focus on to keep your business at its best? We want to know! Leave a comment or connect with us on social media, on Twitter, Facebook, or Instagram.



2 comments
Sandra
Thanks for the freebies. TBH, I felt so dumb “learning” how to make the “Quick & Dirty” DIY tabs, lmbo, I was like, “Duh!, How come I couldn’t come up with that?” lol. Thank you for bringing it to mind lol.
Sandra
Alejos
Nice ideas !